Wednesday, October 25, 2006
Cruisin’ …
I am making some good progress on the cabinets. All of the machining is finished. I have dry fit up all of the pieces and fine tuned the joinery.
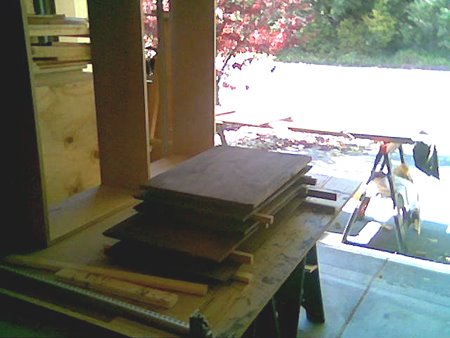
I started staining the various pieces today - in shifts. In the image below, you can see one of the base units stacked on the work bench while the other base unit is on the rack outside.

The piece standing up behind and to the left of the stack is one of the upper units, dry fit up and clamped. I notched the blind dados this morning and made sure they all fit properly.
I will continue finishing work. The insides will get, in addition to the stain, 3 - 4 coats of top coat and the outside surfaces 6 - 8. All hand rubbed for that beautiful, deep finish.
I started staining the various pieces today - in shifts. In the image below, you can see one of the base units stacked on the work bench while the other base unit is on the rack outside.
The piece standing up behind and to the left of the stack is one of the upper units, dry fit up and clamped. I notched the blind dados this morning and made sure they all fit properly.
I will continue finishing work. The insides will get, in addition to the stain, 3 - 4 coats of top coat and the outside surfaces 6 - 8. All hand rubbed for that beautiful, deep finish.
Wednesday, October 18, 2006
The beginning of the end - well almost...
I am working on joinery and assembly - finishing the inside pieces as well. Things are starting to move more rapidly now. Each day will see the project closer to completion, which should be next week, if all goes well.
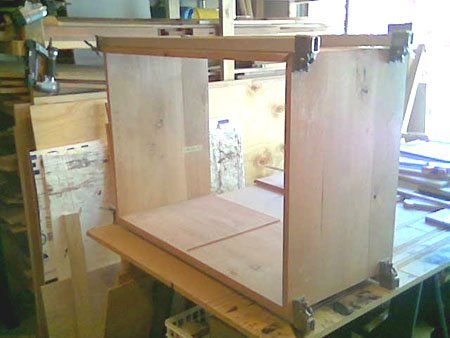
Here are the lower cabinets whilst fitting the center wall. It has blind dadoes top and bottom.


I will do some finishing on the inside tomorrow and get the upper sections ready as well. The joinery takes some time as I want them to be as perfect as I can make them. The top joints on the lowers are pegged miters [3 on each vertical and horizontal] and the bottom joint a rabbet with dowels for long lasting strength [again 3 each].
I’ll try to get some more pix tomorrow or the next day.
Here are the lower cabinets whilst fitting the center wall. It has blind dadoes top and bottom.

I will do some finishing on the inside tomorrow and get the upper sections ready as well. The joinery takes some time as I want them to be as perfect as I can make them. The top joints on the lowers are pegged miters [3 on each vertical and horizontal] and the bottom joint a rabbet with dowels for long lasting strength [again 3 each].
I’ll try to get some more pix tomorrow or the next day.
Wednesday, October 11, 2006
The end of the beginning...
All of the pieces are cut to final size and joinery is the task at hand. A few of the pieces may need to be recut if they rack or warp or cup or split or ??? But, with luck, they'll all be just peachy.
I include making holes for the shelf pins as part of the joinery as it is a task requiring meticulous attention to detail - no one wants shelves that rock.
My FesTool Guide Rail and router work really well for making the Euro spaced holes [32 mm on center]. I developed my own fixture for the stops and find that it works at least as well as the one you can buy. It is also faster [and substantially less expensive] and you can see the work area [that means fewer mistakes -- hopefully]. The two images below show how it all works - I think it's pretty slick.


As soon as I finish with this task, I’ll start on the side and top joinery for the bottom section- I’m still debating what will look best and provide long lasting strength. I’m leaning to a tenoned or doweled miter for the top of the bottom section and a rabbeted and doweled joint for the bottom... we’ll see.
Wednesday, October 04, 2006
Back on track
I got a little behind with meetings and paperwork, but am catching up quickly.
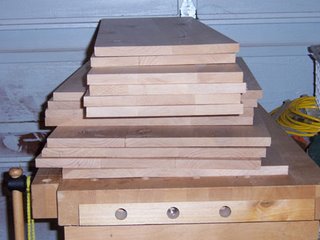
This image shows all of the main pieces ready for final work - drilling shelf holes, joinery, finish, assembly and such.
I have planned the rails and stiles and will cut them to size in the morning, and will likely begin finish work on them and the other pieces as well.
I have the design and construction of a large hutch in the shop - I have some of the sheet goods cut out and am working on fixtures for working the larger pieces. It is an exciting, challenging and fast track project for one of my commercial clients.
Monday, October 02, 2006
Still moving along
I’ve been planning the sides and tops down to finish - by hand. It looks so much better when you do it that way.

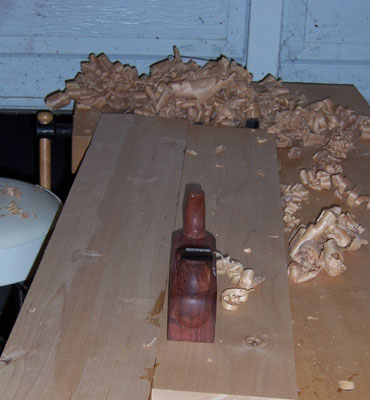
When you’re planning, you get into a rhythm and it feels good! Paper thin shavings seem to materialize from the wood surface, and the wood feels smooth and fine when you're finished. It is one of the core woodworking endeavors - it is this kind of work that gives the furniture soul and character.

Corny as it may sound, 100 years from now, on whatever Antique RoadShow is then, it is my hope and thought for this piece, and every piece I make, that some expert will look at it and say, “This was made by an artisan craftsman in the California Wine Country. We see his work from time-to-time and it has a lasting quality and simple elegance to it we see but rarely these days.”
I have several planes. The two you see here are: a Jack Plane made by Steve Knight in Portland; it is made of Purple Heart with an Ipe sole; the other plane is a smoother, simple wood design and inexpensive, but the steel holds a good edge and it works amazingly well.
Tomorrow, I will cut everything to final size and start ripping rails and stiles. Things are moving along quite well.
![]()
Subscribe to Posts [Atom]